What you’ll accomplish
After completing this guide:- Peach will appear as an Enterprise Application in Microsoft Entra
- Users will be able to sign in using Microsoft 365
- Shared mailboxes can be connected to Peach
- Your team can send and receive emails from Peach
You must be a Microsoft Entra administrator to complete this setup.
Prerequisites
Before you begin, ensure you have:- Microsoft Entra admin access
- At least one shared mailbox
- Permission to add Enterprise Applications
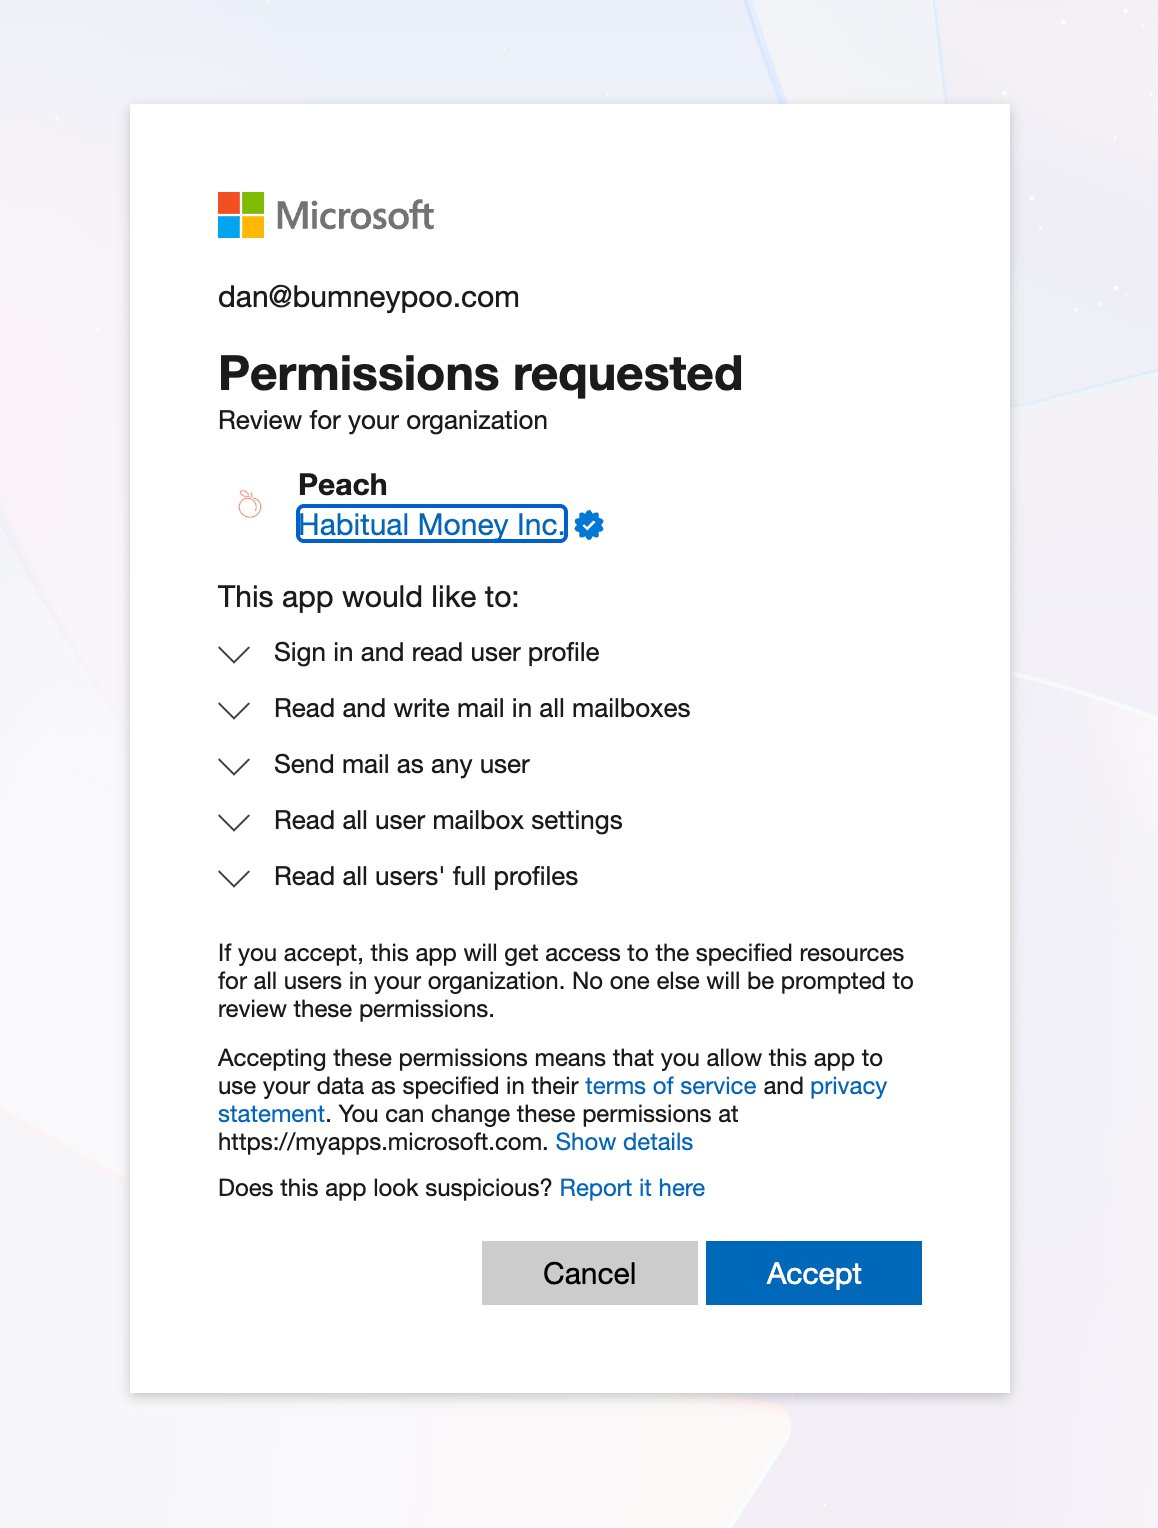
Step 1: Grant Admin Consent
Open the following URL while signed in as a Microsoft administrator:This creates the Peach Enterprise Application within your Microsoft tenant.
Step 2: Verify Peach was added
Navigate to: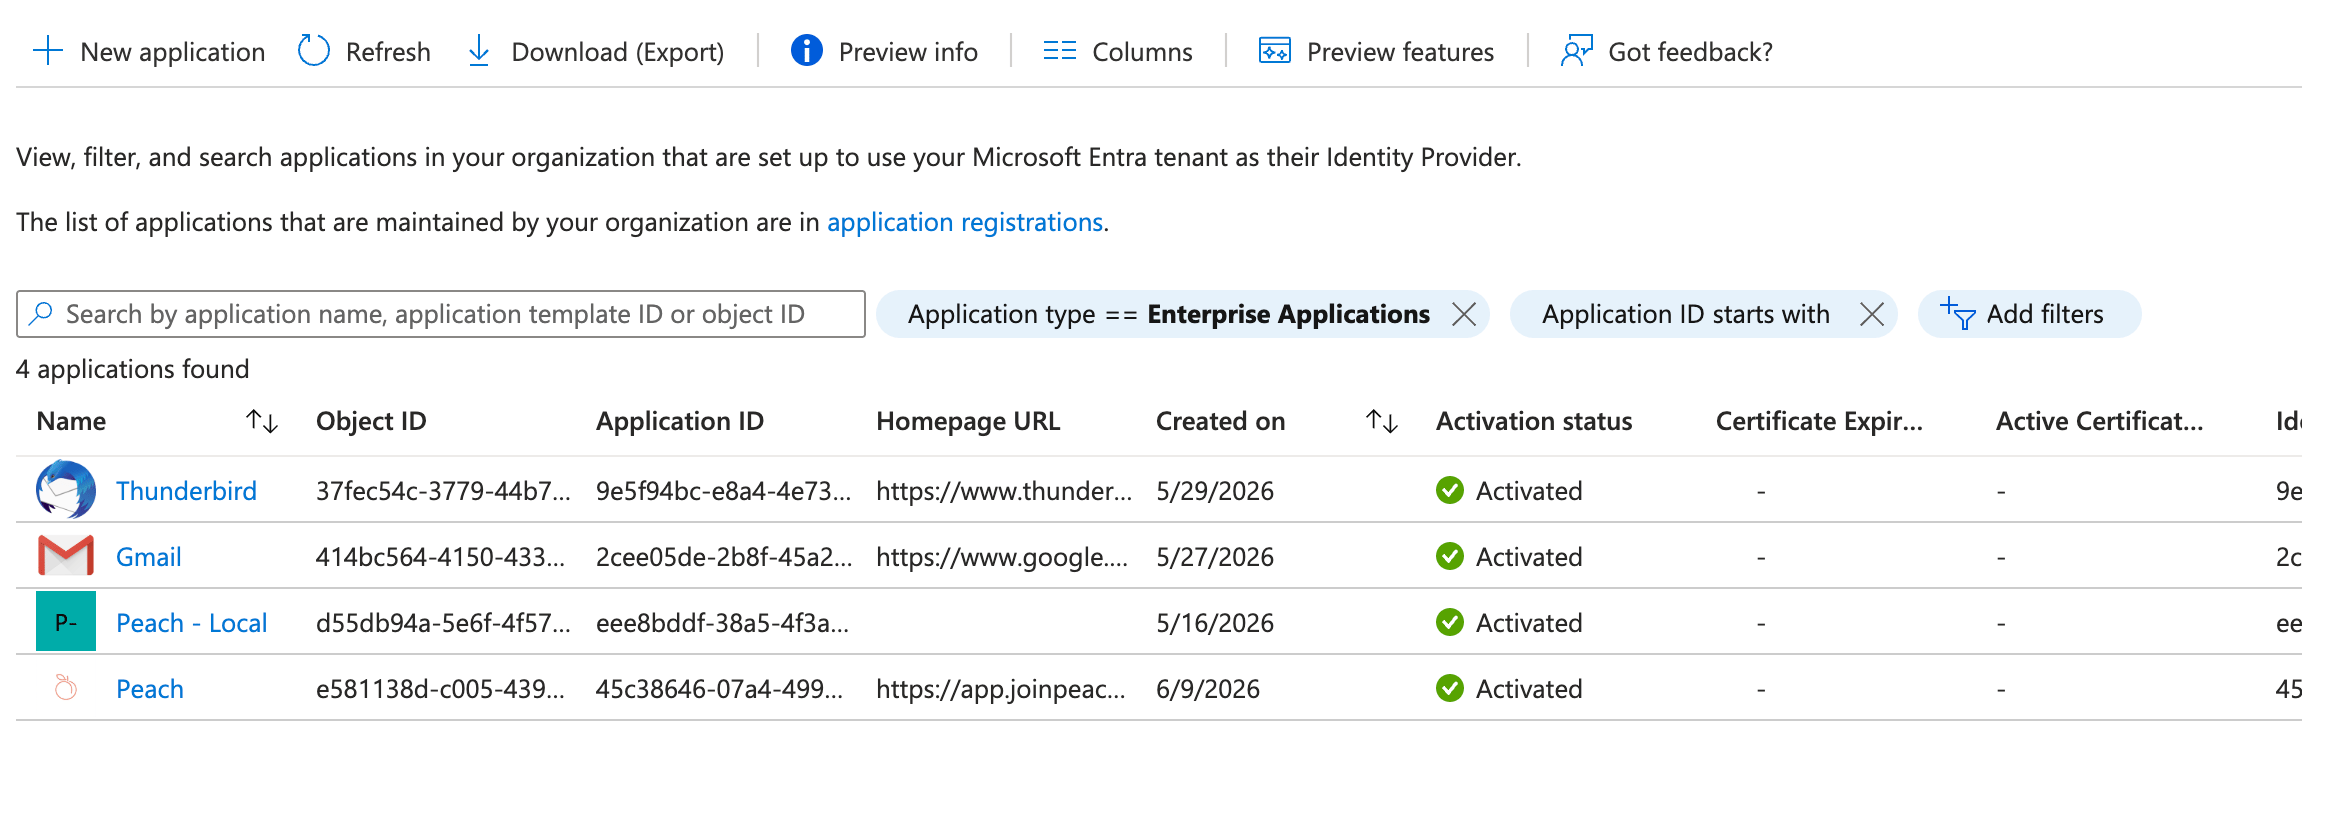
If Peach appears in Enterprise Applications, the consent step was successful.
Step 3: Open the Peach application
Select Peach from the Enterprise Applications list.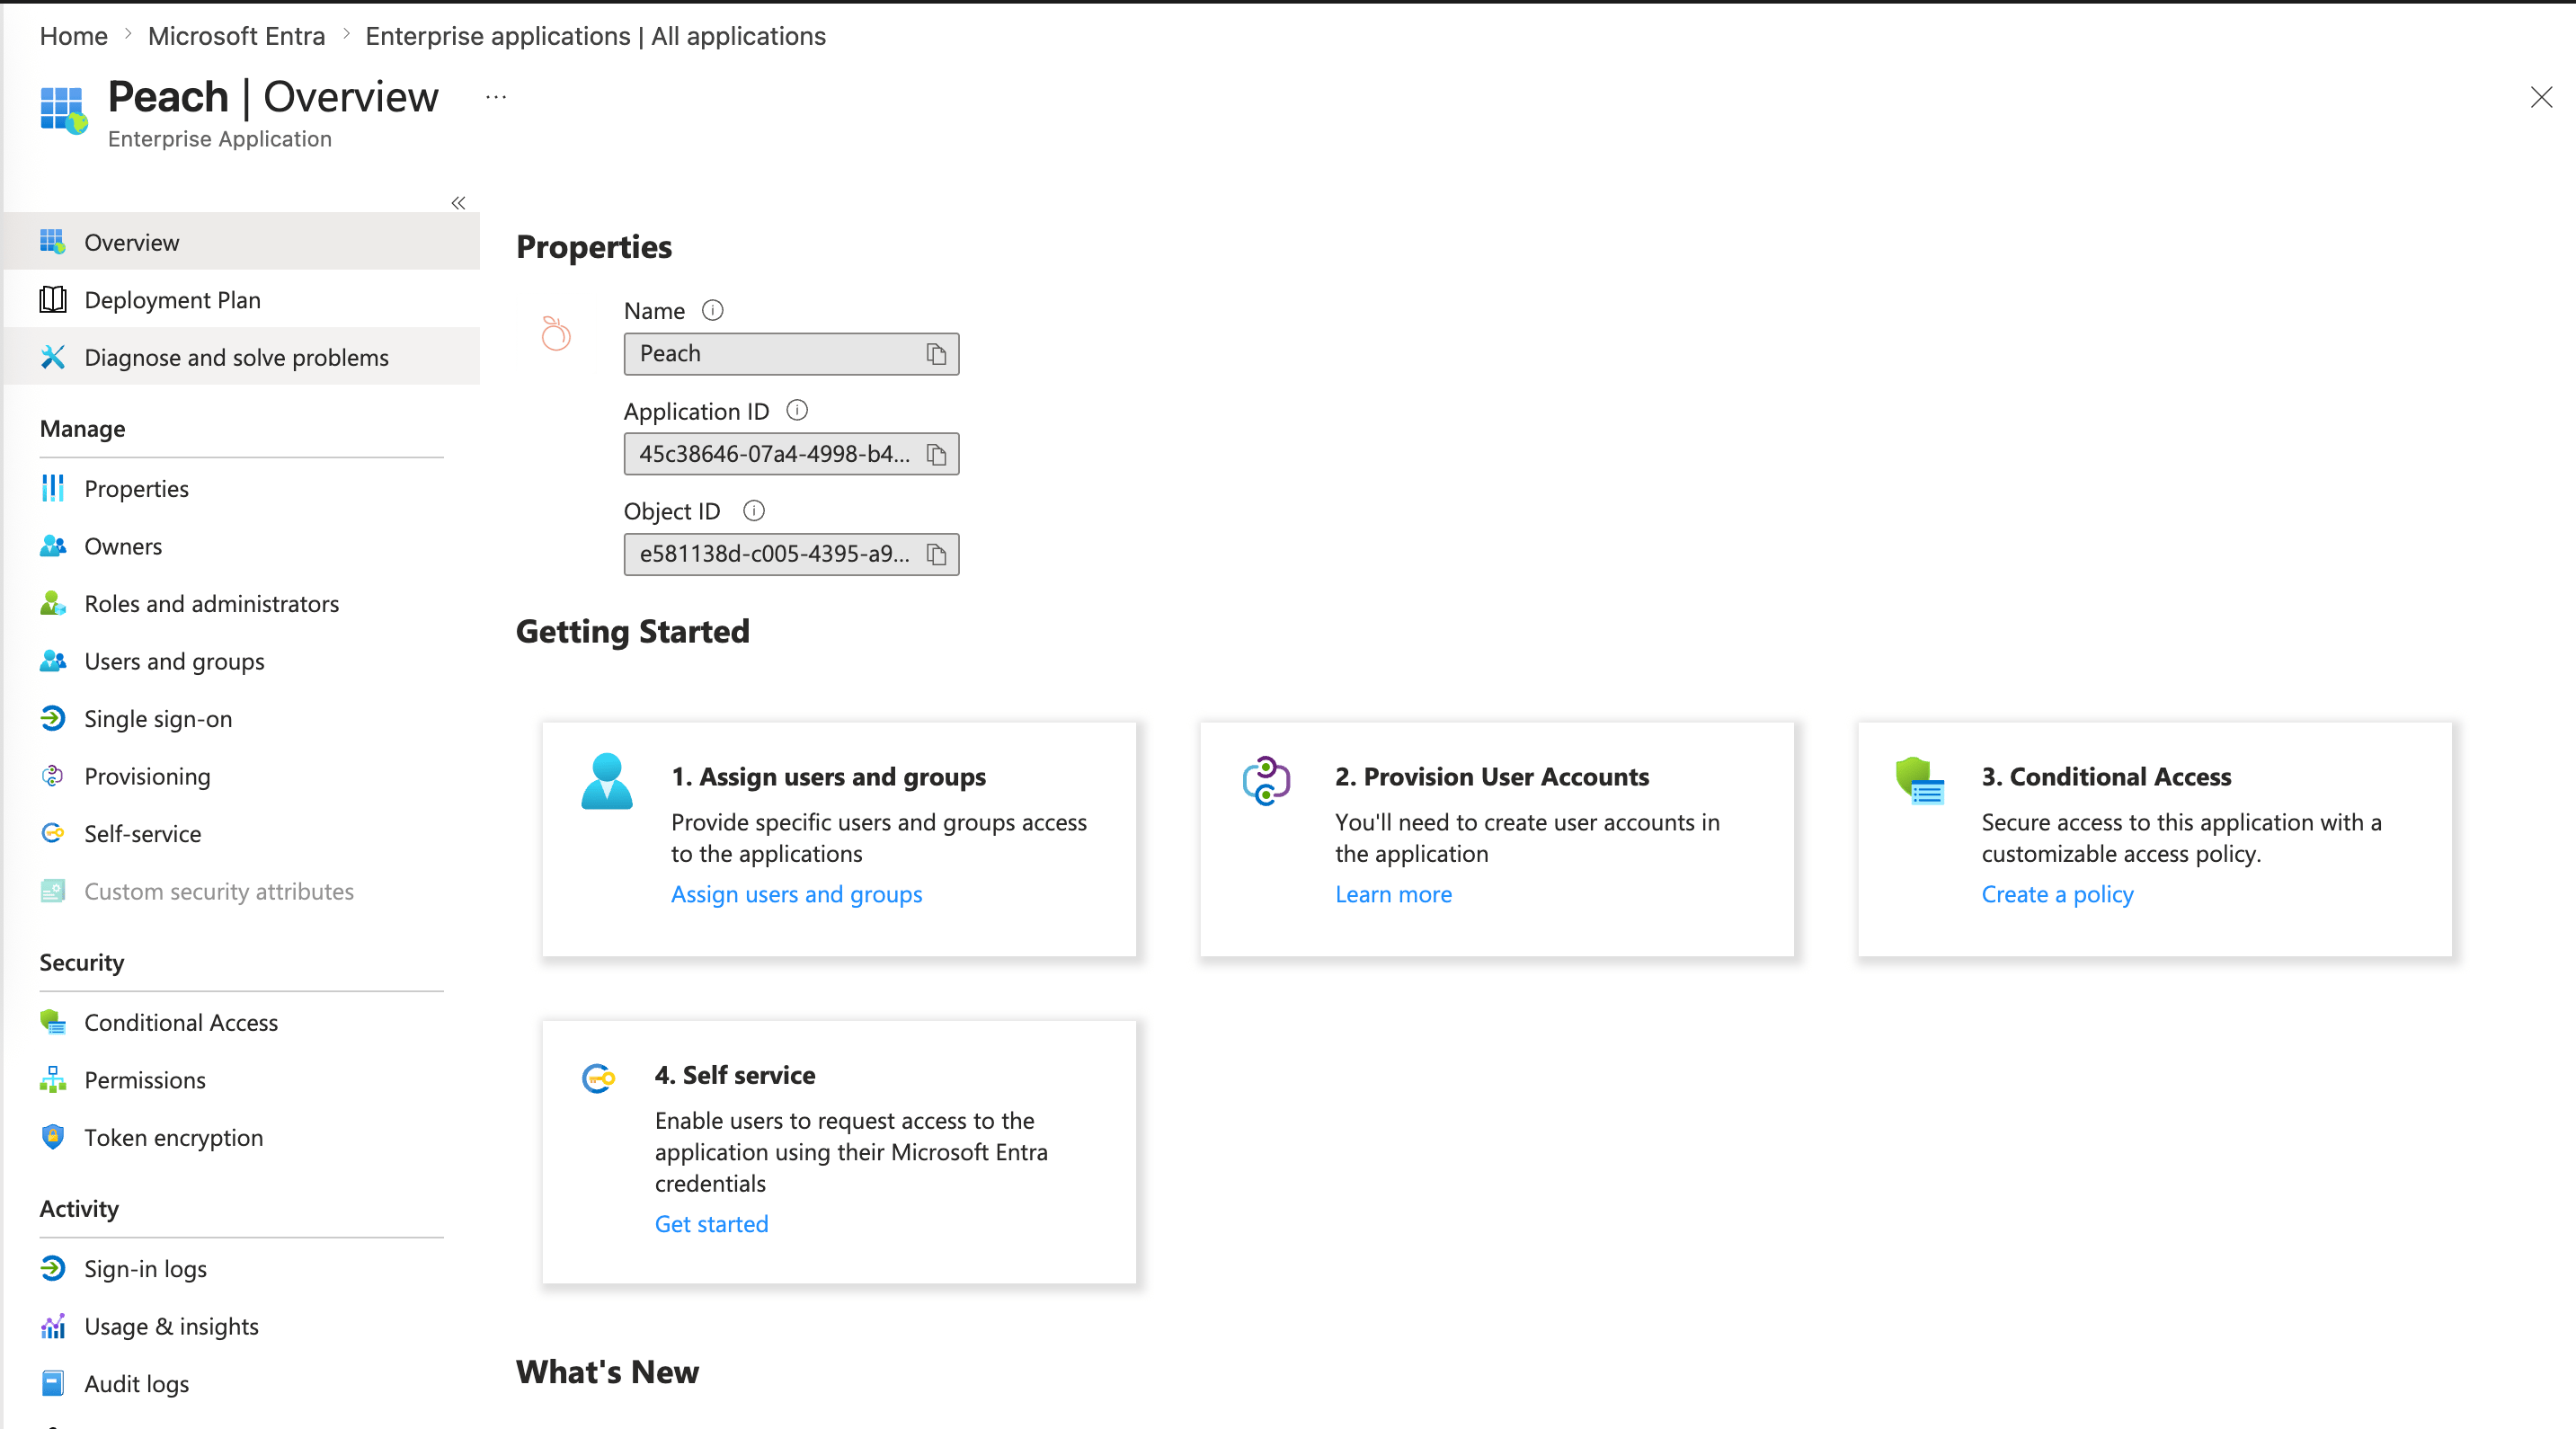
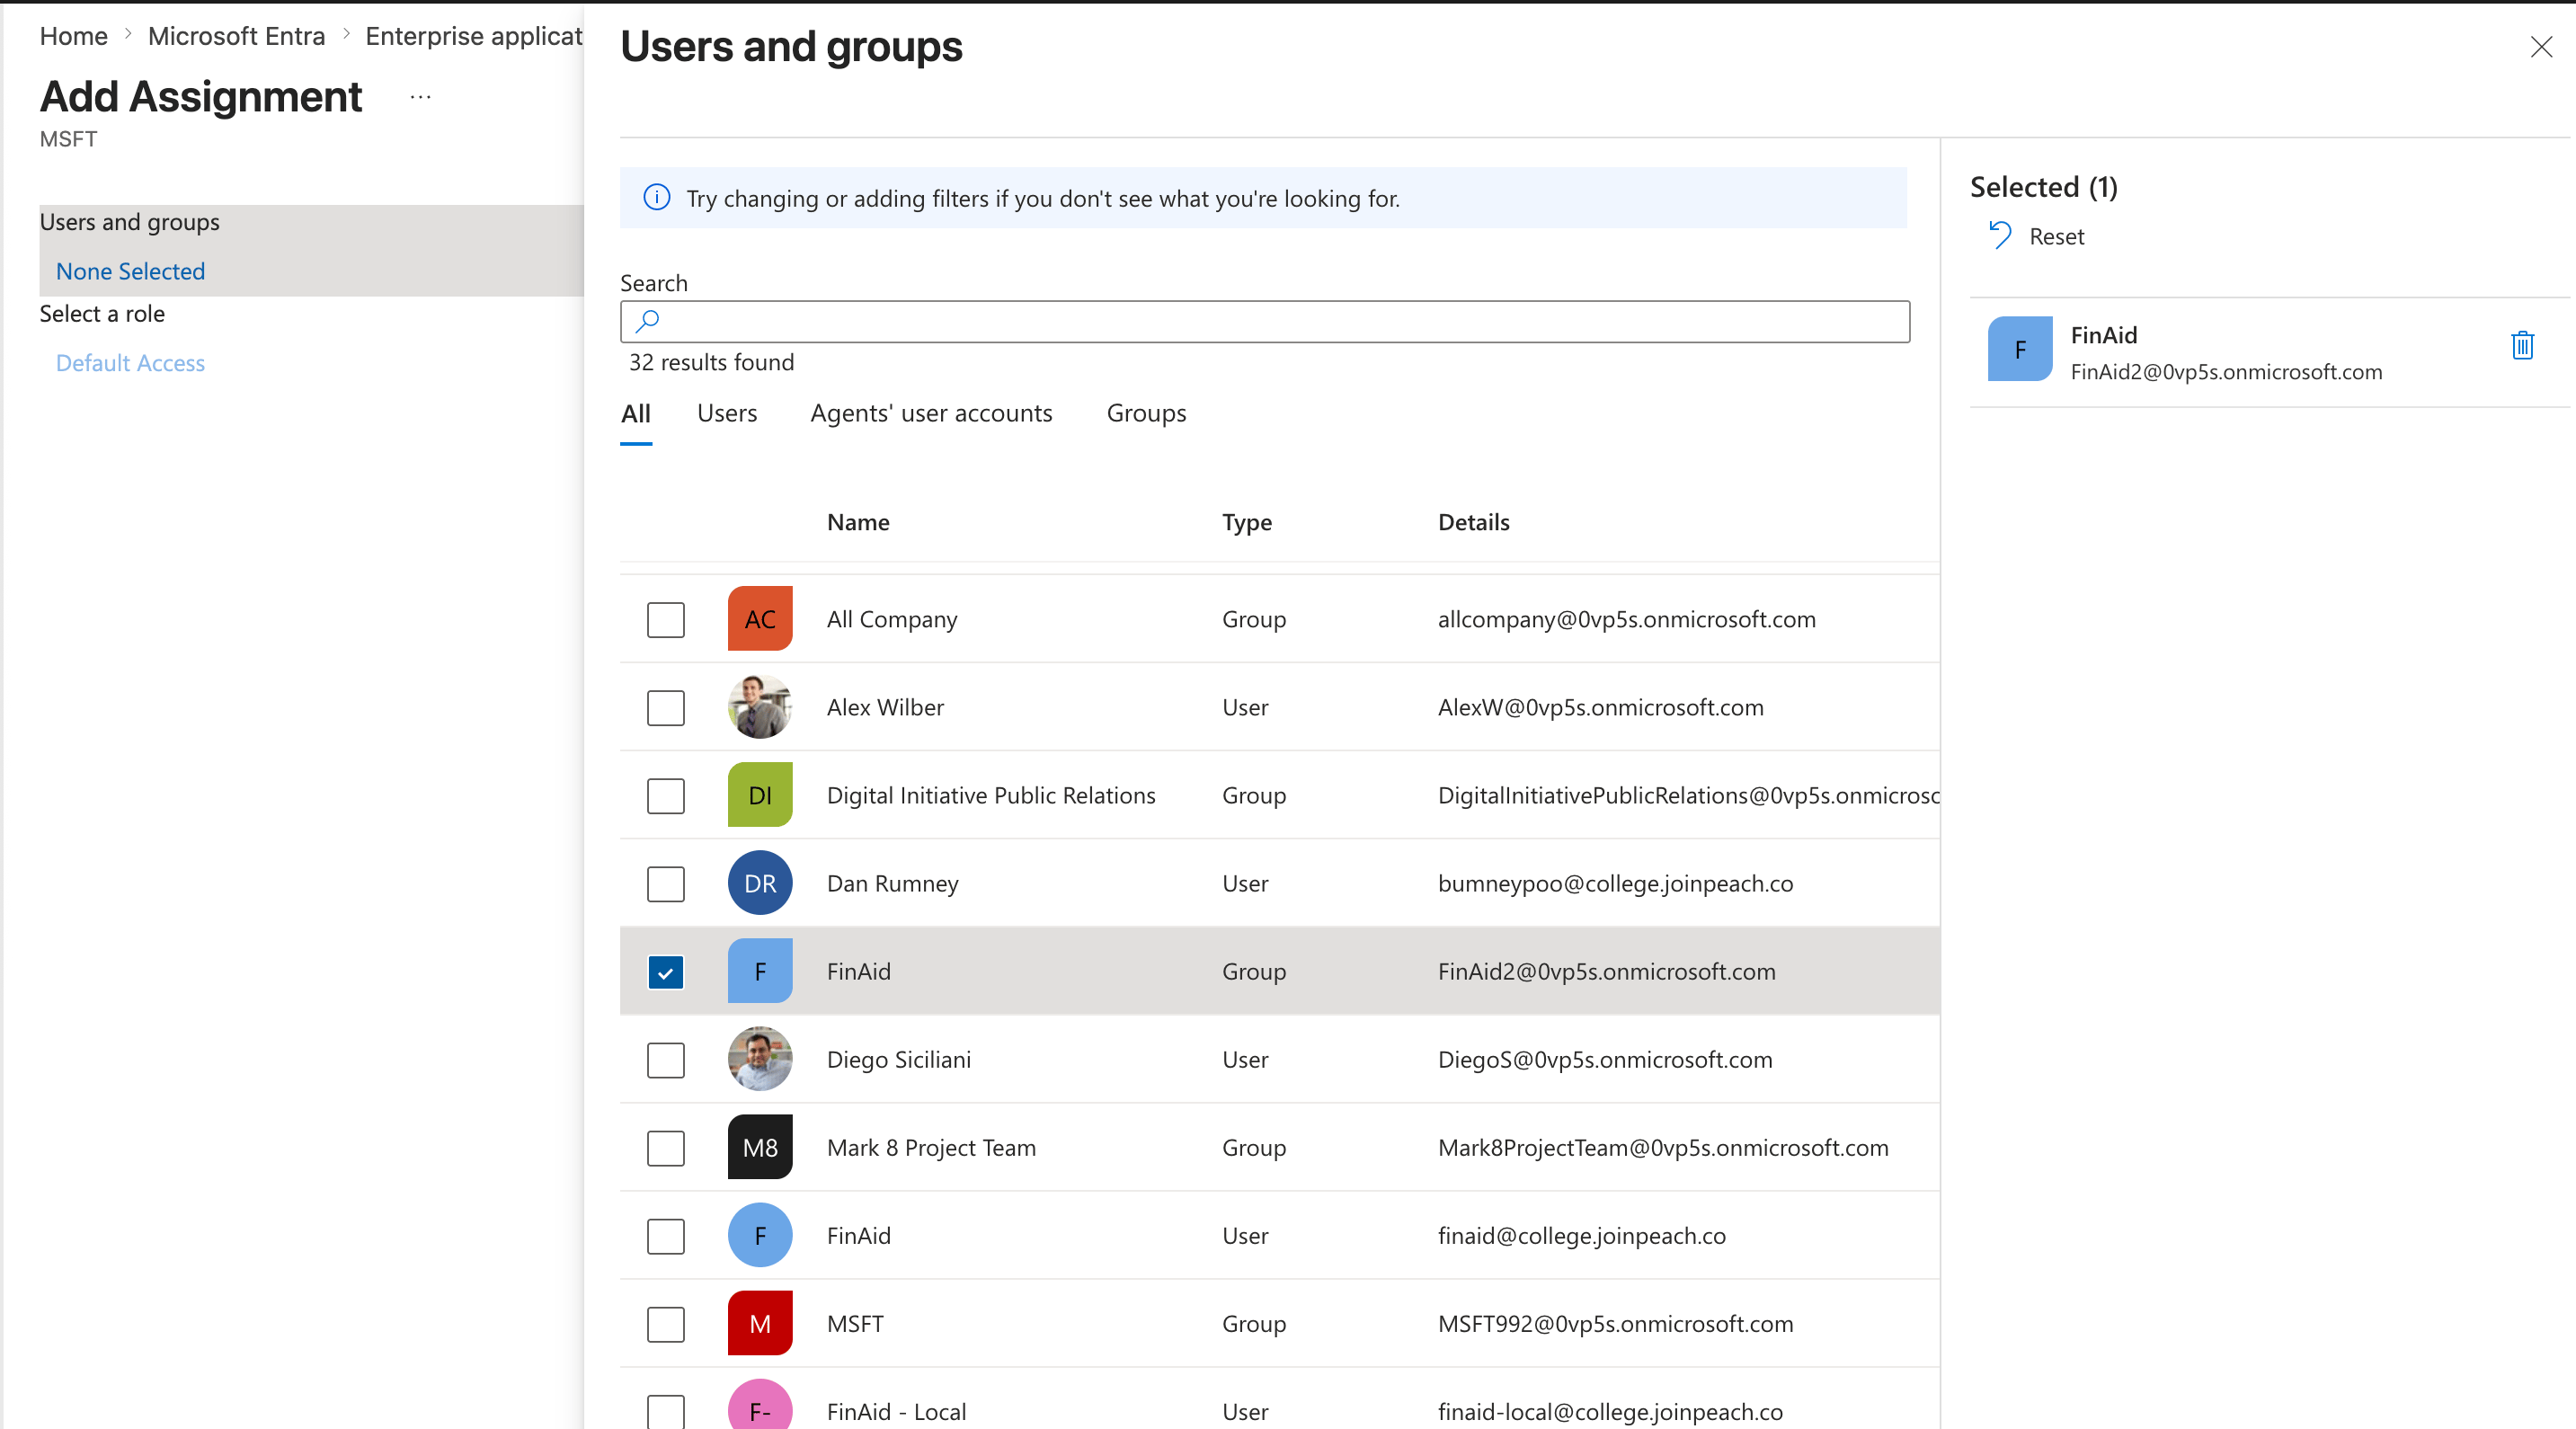
Step 4: Assign users and groups
Navigate to: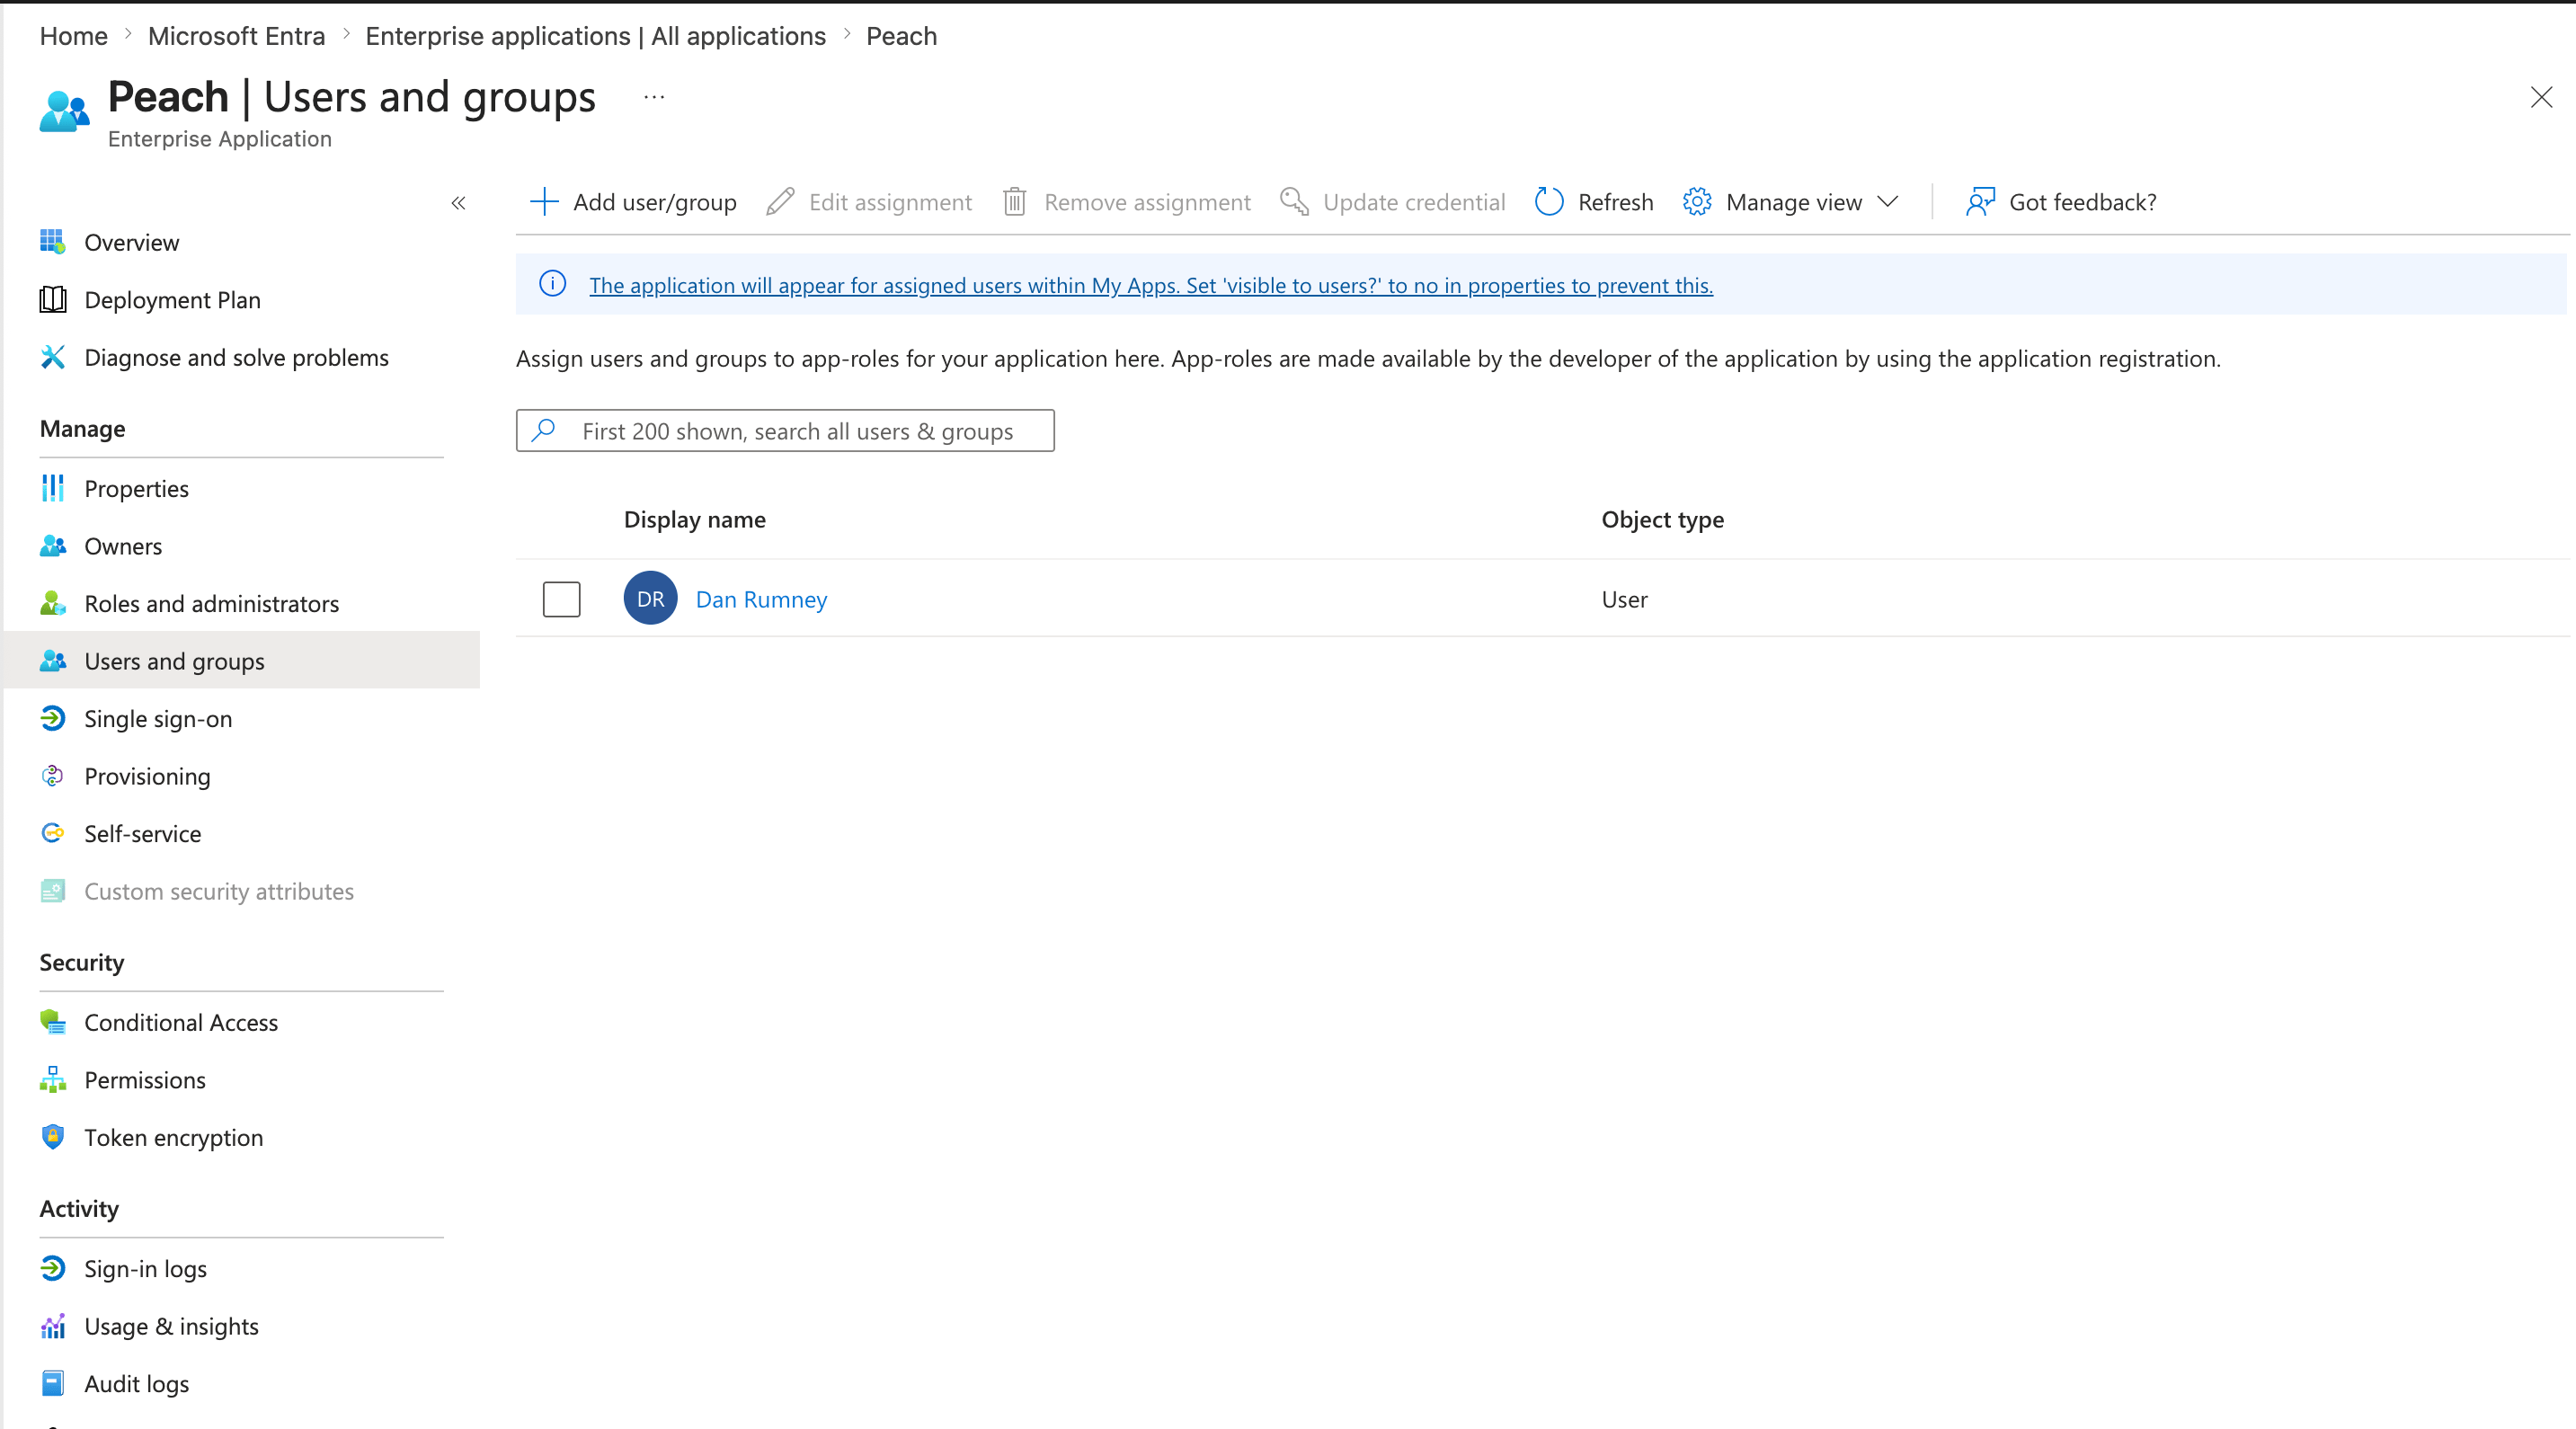
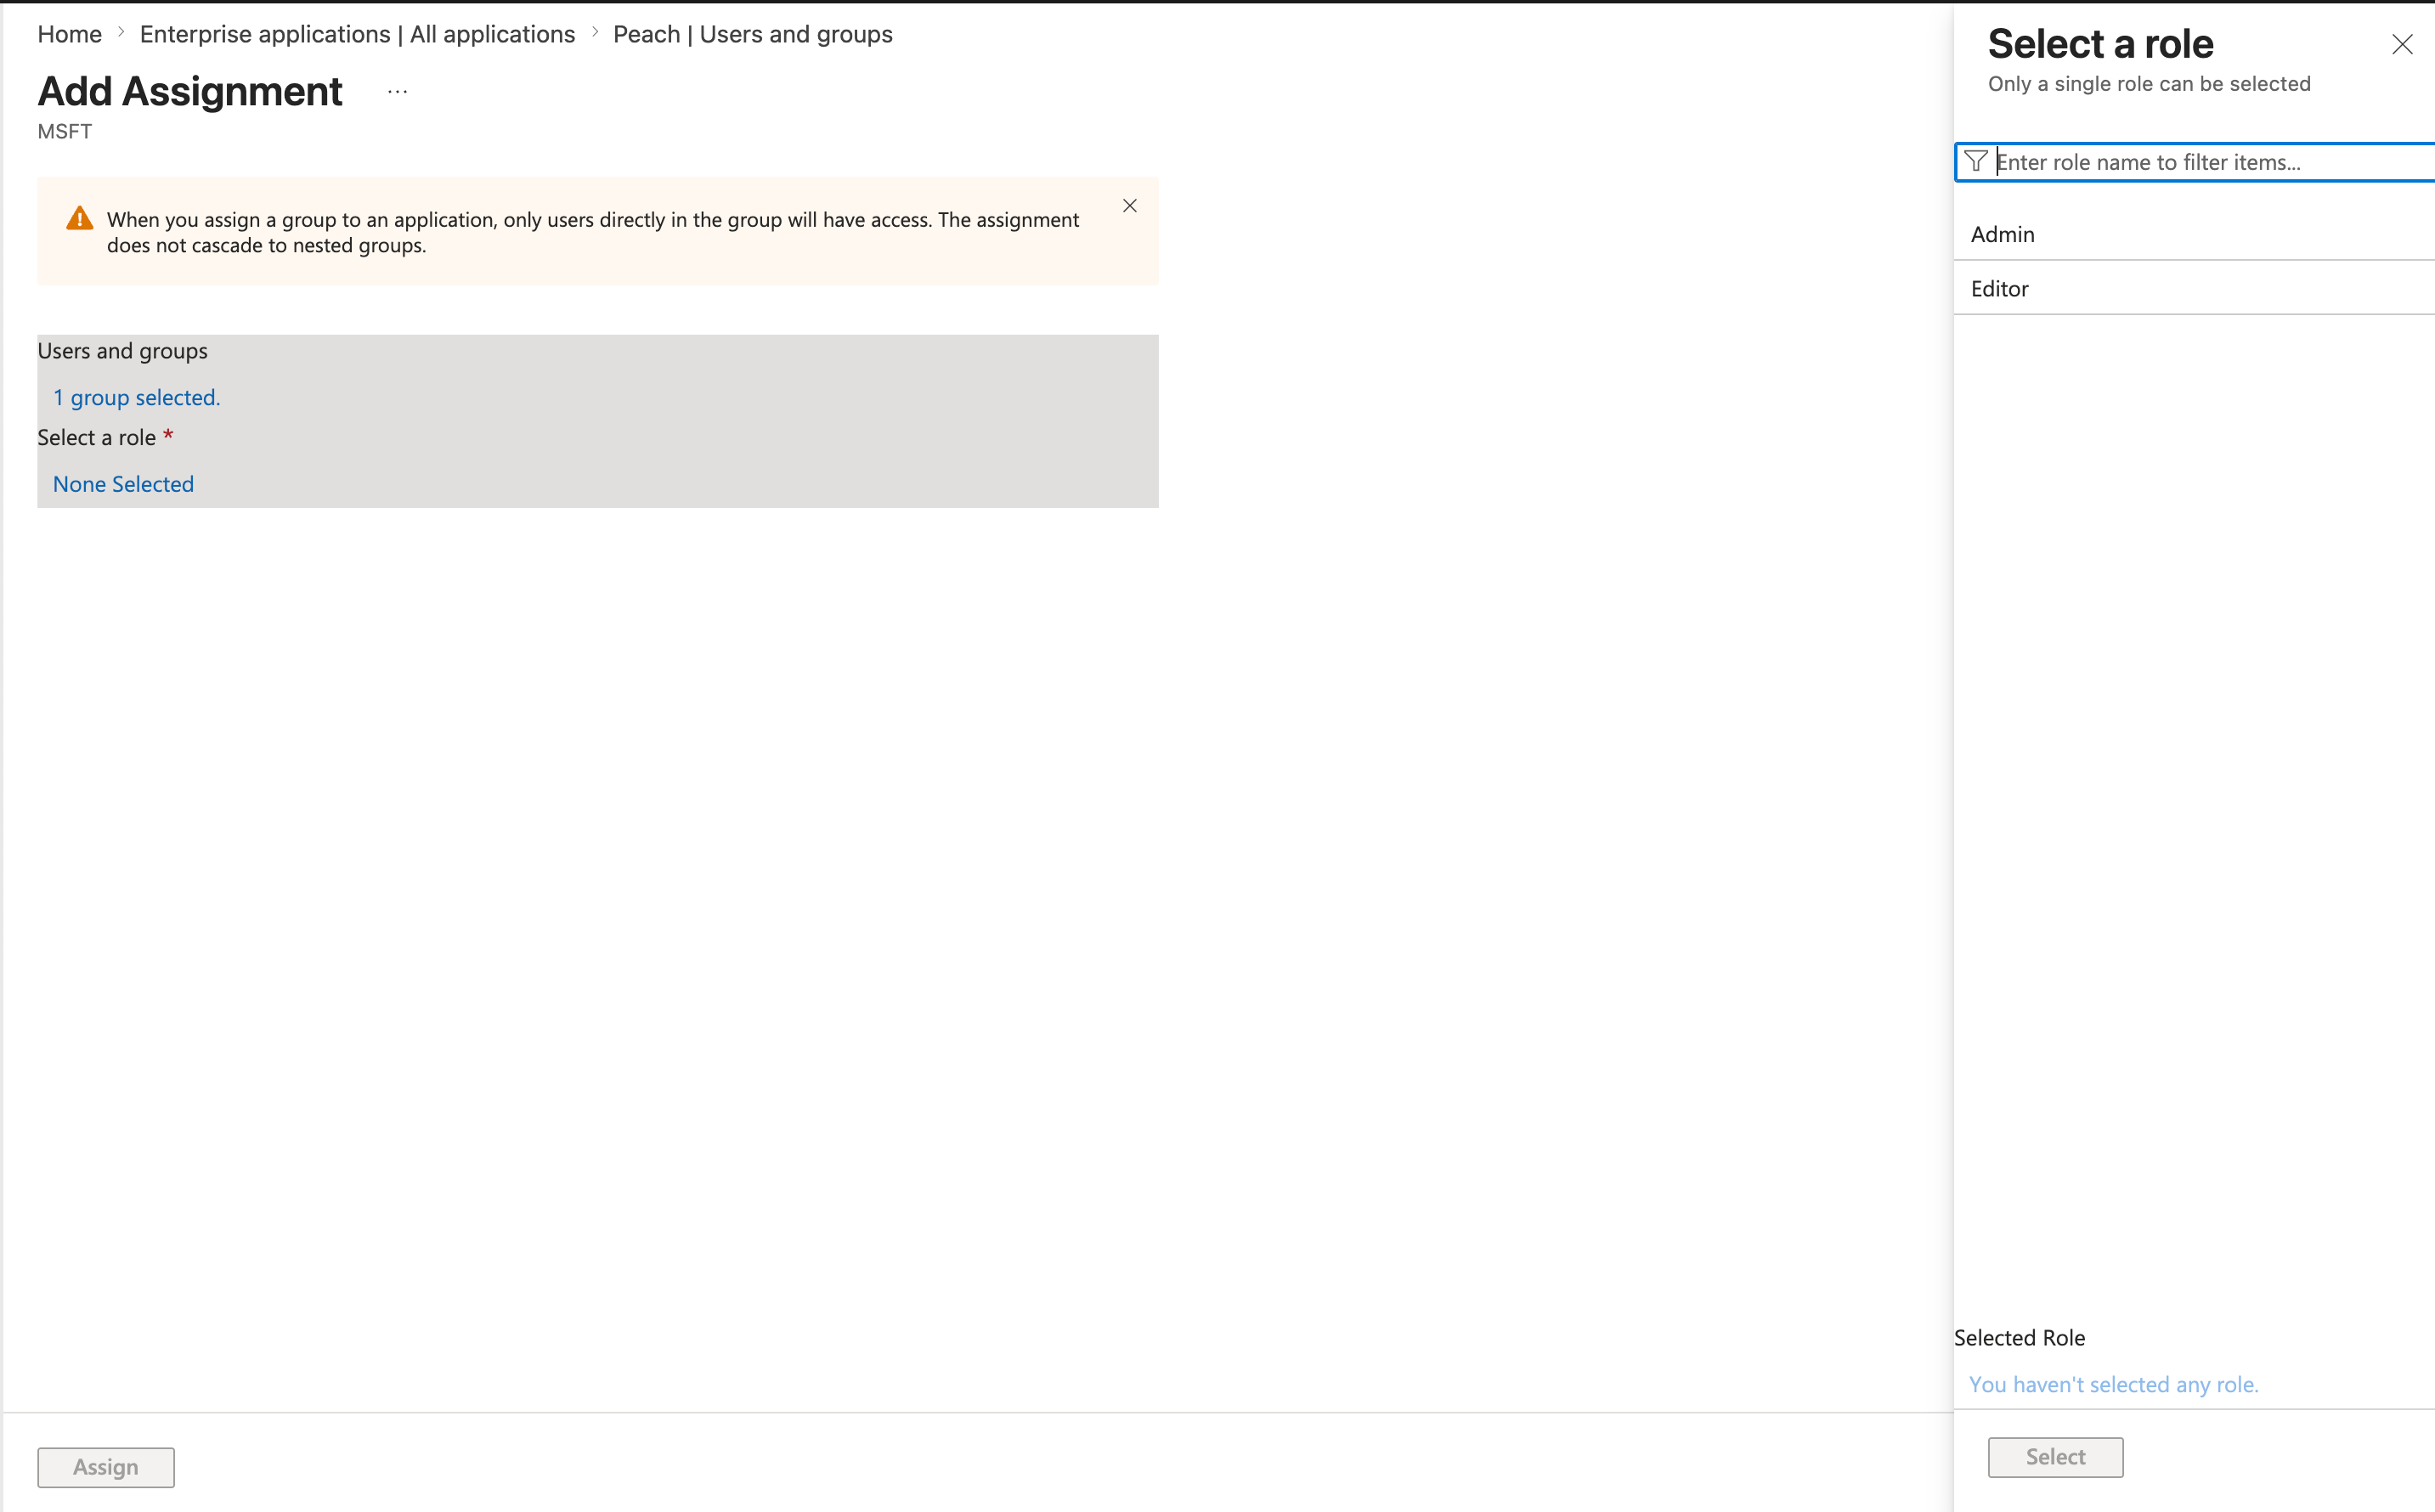
Step 5: Assign roles
Each user or group must be assigned a role.Admin
Manage users, integrations, shared inboxes, and platform settings.
Editor
Work tickets, generate AI responses, and send emails from connected inboxes.
Verify access
Ask an assigned user to:- Navigate to
app.joinpeach.co - Select Sign in with Microsoft 365
- Complete authentication
Successful login confirms that Peach has been properly configured within your Microsoft tenant.
Troubleshooting
Peach does not appear in Enterprise Applications
Peach does not appear in Enterprise Applications
Verify the admin consent step was completed using a Microsoft Entra administrator account.
Users cannot sign in
Users cannot sign in
Confirm the user or security group has been assigned to the Peach Enterprise Application.
Shared mailbox does not appear during onboarding
Shared mailbox does not appear during onboarding
Next Steps
Connect a Shared Mailbox
Configure permissioins for the inbox your team will use inside Peach.
Test Email Delivery
Verify Peach can successfully send outbound emails.