

Ticket overview
At the top of each ticket, you can see the student, email subject, category, status, and assigned team member. You can also use the controls in the upper-right corner to manage the ticket.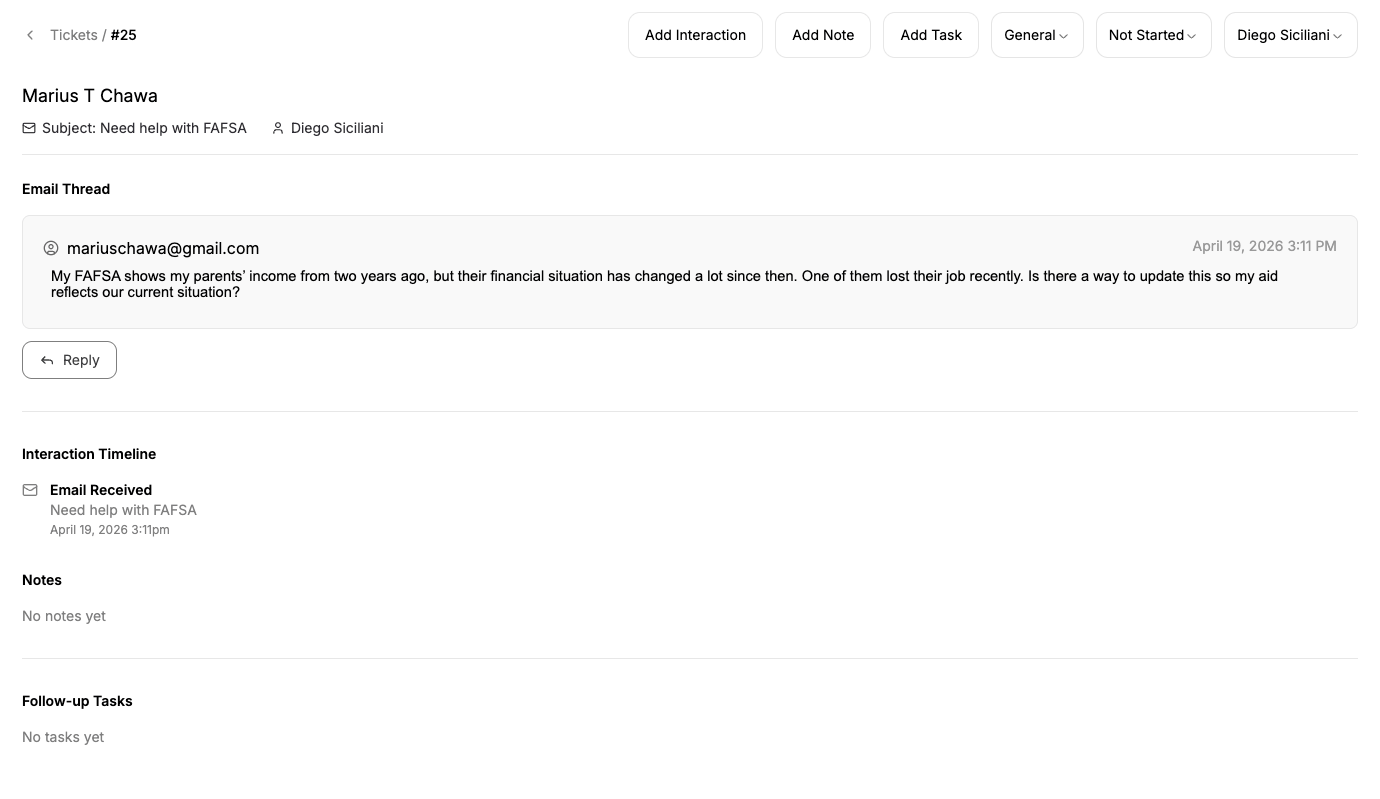
Manage a ticket
From the top of the ticket, you can:- Add an interaction
- Add an internal note
- Add a follow-up task
- Change the category
- Update the status
- Assign the ticket to a team member
Add an interaction
Select Add Interaction to add another interaction with the student to the ticket. Interactions can include:- Another email
- A phone call
- A walk-in conversation
Adding interactions keeps relevant student communications together so staff can see the full context of an inquiry in one ticket.
Add a note
Select Add Note to add internal context for your team. Notes are visible to Peach users at your institution and are not sent to the student. Use notes for information such as:- Internal context
- Research completed by another staff member
- Special circumstances
- Instructions for the next person working the ticket
Add a task
Select Add Task to create a follow-up item associated with the ticket. Tasks can be used to track work that needs to happen before the inquiry can be completed.Change the category
Use the category dropdown to update the topic associated with the ticket. Categories help your team organize inquiries and can also be used to filter tickets from the Tickets page.Categories can be customized to match the types of inquiries your office receives.Learn more about Categories →
Update the status
Use the status dropdown to reflect the current state of the ticket. Available statuses include:- Not Started
- In Progress
- On Hold
- Resolved
- No Ticket Required
Assign the ticket
Use the assignee dropdown to assign the ticket to a team member. Assignment makes it clear who is responsible for following up on the inquiry.Review the email thread
The email thread displays the conversation associated with the ticket. Review previous messages to understand the full context of the student’s inquiry before responding.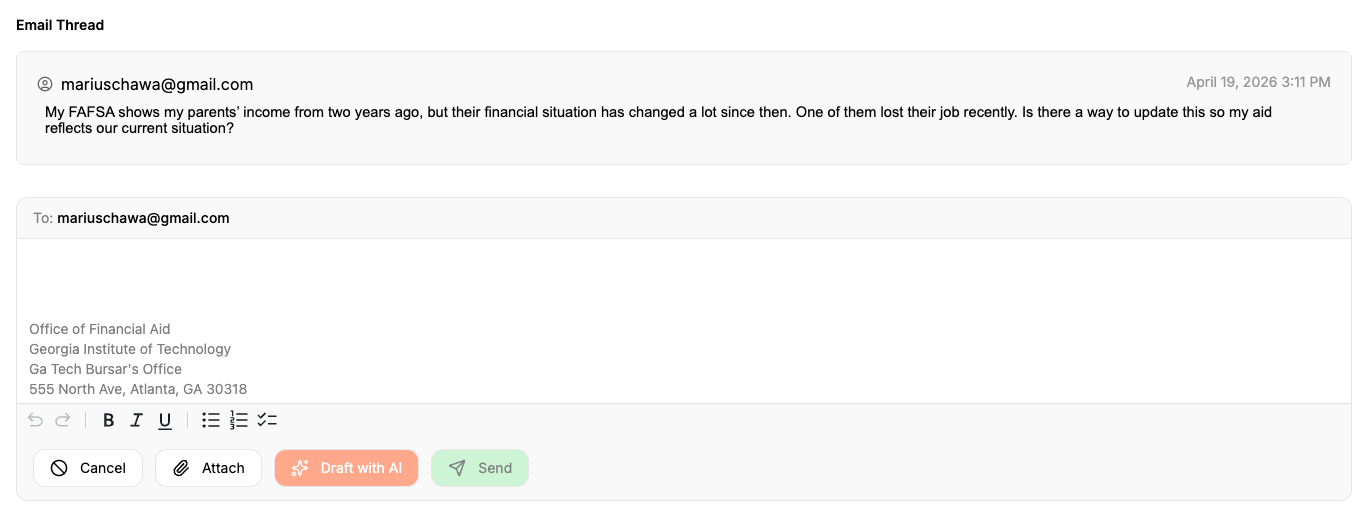
Reply to a student
You can respond to an email directly from the ticket. There are two ways to draft a response.Write your own response
Type directly into the response editor. You can format your response and attach files before sending.Draft with AI
Select Draft with AI to have Peach generate a response based on the context available in the ticket. Peach can use information including:- The student’s inquiry
- Earlier messages in the ticket
- Institutional policies and procedures available to Peach
- Other relevant ticket context
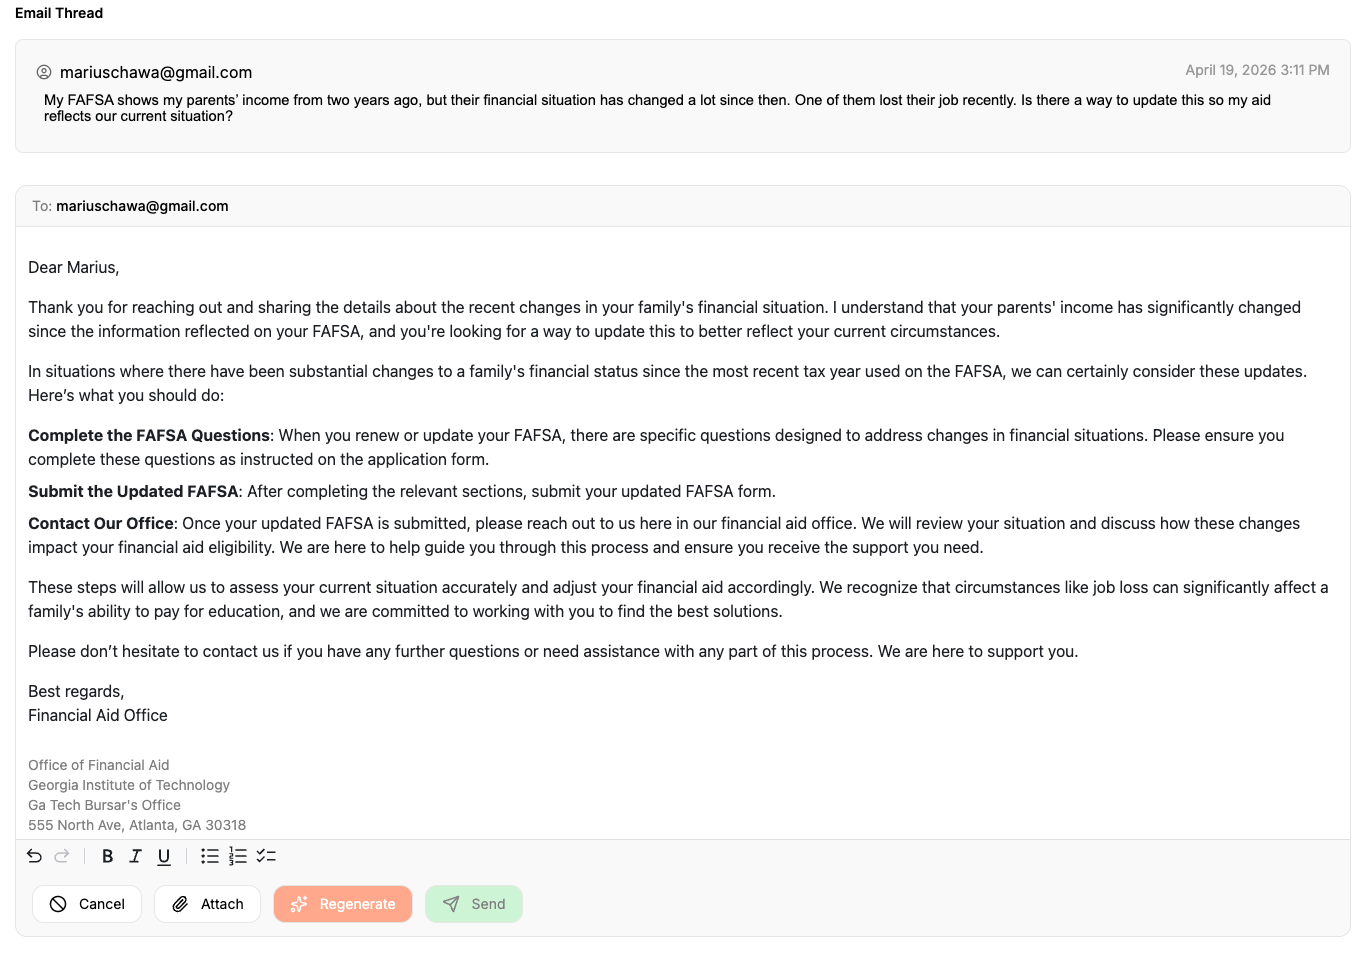
AI-generated drafts are designed for staff review. You can edit the response before sending it to the student.
Regenerate a draft
If you want Peach to create a different response, select Regenerate. The existing draft will be replaced with a newly generated response based on the ticket context.Attach files
Select Attach to include documents or other files with your response. When your response is ready, select Send.Interaction timeline
The Interaction Timeline provides a chronological summary of communications associated with the ticket. It can include events such as:- Emails received
- Emails sent
- Additional interactions added by staff
Notes
The Notes section displays internal notes that have been added to the ticket. Notes help staff share context that should remain internal to the financial aid office.Notes are not included in emails sent to students.
Follow-up tasks
The Follow-up Tasks section displays tasks associated with the ticket. Use tasks to keep track of additional work that needs to be completed as part of resolving the student’s inquiry.Keep the full history together
A ticket can contain more than an email conversation. By adding interactions, notes, and tasks, your team can maintain a complete record of work related to the student’s inquiry. For example:1
Student sends an email
The original inquiry is automatically imported from the shared inbox.
2
Staff calls the student
The phone conversation is added using Add Interaction.
3
A follow-up is needed
A staff member creates a task to track the additional work.
4
Internal context is recorded
A note is added so other team members have the context they need.
5
The student receives a response
Staff draft and send the final email directly from the ticket.
Next Steps
Tickets
Learn how to search, sort, and filter your ticket queue.